LCD Screen is distorted on Poolmate LIVE or Poolmate HR
This is likely caused by the LCD contrast adjustment. If you're looking for this, you may not be able to read your screen as the LCD contrast is too far off, so here's what you do...
From the clock: Hit Mode 3 times, that brings you to the set up screen. Right away, hit the start button once. Then hit Mode again 7 times, which brings you to the LCD screen. Now use the up and down buttons on the right to adjust your LCD from 0-7. Likely you need to go down.
Windows 8 PoolMatePod Installation
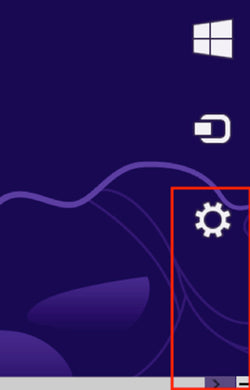
Move the cursor over the top or bottom right corner or the screen and it will show extra options on the right side of the screen (This is the new Charm Bar in Windows 8). Choose the Settings option (icon looks like a Gear).
Choose Change PC settings, below the Power option

Choose General on the left hand side and then click Restart now button on the right

When Windows Restarts Click Troubleshoot

Click Advanced Options

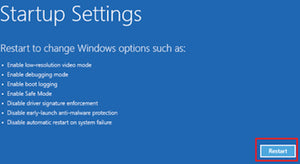
Click Startup Settings

Click the Restart Button
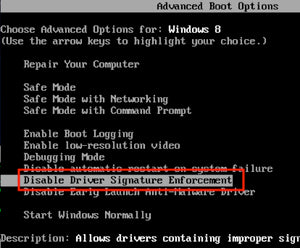
Choose the Disable Driver Signature Enforcement and hit the Enter key to start Windows
Plug in the pod
Double click on C:/Program Files (may be in Program Files (x86) folder)/Swimovate/PoolMate Pro v2/Driver/setup.exe and installation should begin.
Go to Computer, click Open Control Panel, click System and Security, look under System and double click on the device manager. Check that Pool-Mate USB Pod (COMXXX)
Where XXX is a number, appears under Ports (COM&LPT). Your Pod is now correctly installed.
Any problems please let us know.
Version A Pod Manual Installation Instructions
First make sure you have downloaded the Version2 software from our website and installed it.
Plug the USB Pod into a spare USB port on your computer. If the USB driver hasn’t installed you will need to do a manual install.
Step 1 Open the device manager- from Start go to Control Panel/System and select the Hardware tab.
Click on Device Manager. Look for “Swimovate pod” or “Pool-Mate USB Pod” or “USB serial Port” under Ports (COM &LPT).
If it is not installed it will have a yellow exclamation mark by the side of it.
Right click on this and select update driver.
The Found New Hardware wizard appears and will ask “Can Windows connect to Windows Update to search for the software?”
Select No, not this time and click Next
Select Install from a list or specified location
Select Include this location in the search and click Browse
Select C:/Program Files/Swimovate/PoolMate Pro v2/Driver/ CDM20814_WHQL_Certified (note it may be in the Program files x86 folder if you can’t find it here).
Click OK, Click Next. A window will appear titled Hardware installation, click on Continue Anyway and the wizard will start installing the software.
This should complete installation, click Finish
Step 2 Looking in the device manager again there will now be another entry with a yellow exclamation mark called “USB serial port”
Follow the same steps as above.
Right click on this and select update driver.
The Found New Hardware wizard appears and will ask “Can Windows connect to Windows Update to search for the software?”
Select No, not this time and click Next Select Install from a list or specified location Select Include this location in the search and click Browse
Select C:/Program Files/Swimovate/PoolMate Pro v2/Driver/ CDM20814_WHQL_Certified (note it may be in the Program files x86 folder if you can’t find it here).
Click OK, Click Next.
A window will appear titled Hardware installation, click on Continue Anyway and the wizard will start installing the software.
This should complete installation, click Finish)
To check all is installed Go to device manager and check that Swimovate Pool-Mate Download Port (COMXXX) where XXX is a number, appears under Ports (COM&LPT). Your Pod is now correctly installed.